Friday, January 29, 2010

New headers, and Some signs....


I know I'm horrible. It's been a blah week, ever have those? I love my little blog and get so excited to post things as they come up but this week has just been blahhhh! Not about my blog, just nothing that I felt worthy of posting, blah with my crafting. It's just been an off week. Anyways I am back. I promise I will have all my organizing posts caught up by Monday. You will be sick of me before the week starts :) I shouldn't promise but I am. Anywho. I have done like zero crafting except for a few little things. I do have some goodwill redos to share soon. I hit up the goodwill a couple of weeks ago for the first time since this summer! They have missed me tons I'm sure of it.


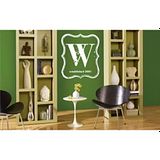
Meet my newest obsession....signs. They are so easy, fun, and the possibilities are endless! I really liked this one not sure about the big pink letters but it's still cute? I used a turquoise color to paint it, sanded it down around the edges then went over it with minwax walnut stain and wiped it down. Now let me just say I recently finally just started using minwax and I like it however some things it seems a little much and it sure does not wipe off much. It says to leave it on 3 minutes then wipe uh no, I wipe immediately or none of it would come off. Anyone? Am I alone?


This sign I made by tearing up a piece of sccrapbook paper that has old looking bookprint on it ( make my heart go pitter patter, love this paper ) and then I cut letters with my cricut on cardstock and used them as stencils, then sanded some more over the letters. 


These blocks are bigger than my normal, 5x5. I really love the colors on this. I don't do much decorating for Valentines Day but found the prettiest vintage valentines papers I couldn't resisit. I stink at embellishing and that is something I am working on. I have so many wonderful ideas and images in my head but when it comes to putting it together I stink. 


Completely off topic I made this header for my other blog. What do you think? I am pretty proud of it. The only thing borrowed is a the free frame and heart that came together from Cutest Blog on the Block ( love them by the way ) the rest I put together on a couple of different editors one being picnik.com


This one I was playing around trying to create my own for this blog. It's not there yet, I need new pictures as in I need to make some cuter stuff to put in the header. And it needs more embellishing which again I stink at. I just got a new header but really am thinking I want one with my photos in it and more me? Not sure what I want half the time. I am so obsessed with changing my blog around until it feels perfect to me. 


Last but not least, isn't he freaking precious??? We were at grams and gramps and he was sportin papas hat. So adorable!! Ohhh and he is totally walking now! He's been steppin but while we were there he was walking for bananas lol. Literally.
That's all, I know I stink. Ohhhh hey, Notice I am now www.BugaboosCreations.com , yippee!! I bought the domain almost a year ago and finally switched it over. Go me.

Also if you want to check out my other blog it's pretty boring right now, but will be recipes, couponing, and family things. I have actually posted more over there this week then here. Here is the link http://thealiceas4.blogspot.com/ It's a work in progress. I made it last year and never touched it.

Oh and notice my little owl in the address bar up top? 

Have a Wonderful Weekend!!!


Tuesday, January 19, 2010

Cheap and Easy Storage Containers...Plus a few Household Tips..


I am a freak for all things storage ( not that I am good at organizing it all ), I LOVE baskets, boxes, plastic containers, you name it, love em. I especially love when they are cheap! They can be used virtually anywhere around the home to organize or contain something. As I posted here before I am working on getting my house organized by the end of February, now I know I have done horribly at posting my updates and such but I promise it's coming along.


After Halloween I bought a bunch of these at Big Lots on clearance for  .30 each as they were 90% off. I knew they could be prettied up and used around the house for odds and ends.


I cute squares of wrapping paper out. The wrapping paper I had bought 50% off before Christmas at Hobby Lobby as it's not Christmasy and I knew I could use it on alot of projects. I got a huge roll for like $2. Anyway....


Using modge podge of course I basically wrapped it like a present and smoothed it all out. ** Hint if when using modge podge you end up with bubbles in the end, don't stress my friends, let it dry then go over it with a hair dryer while smoothing it out. Works for me. Just don't get it to close :) My containers had the little scallop edges around the top, I just lightly pushed down on the paper after gluing it down to get the scallop look. Also don't be a dummy like me, make sure your paper is plenty oversized when gluing it on so when you fold it into the inside it covers up the ugliness in there that you see.


The inside if the cluttery little mess in the entertainment center....


No moreeee....and it's pretty. I covered  all 4 of them I had and they fit perfectly inside here and are great to house the remotes, gaming junk, and some misc. dvds that lost their cases. Also I will probably go back and give the outside a coat of modge podge so they hold up better. Four pretty storage containers for under $2 and an hour of my time. If your like me and on a strict budget and can't spend the money on expensive, pretty matching conatiners. Something like this is perfect. They can be pretty, functional, and very affordable.


Now this is a 2 for one post, haha. Sarah at Thrifty Decor Chick is having a So Fresh So Clean Party and if you haven't already you must stop over to see the pics of her and her bff dyson. Love it! Plus I have had so much fun going through all the links to the party and have learned so many great tips and tricks. I don't have to many but here is a few.


1. This one may sound a bit ok a lot insane but it works. Our poor stroller from our first little guy had sat outside and was abused, sadly it was a very nice stroller. So one day moms ( she's brilliant ) and I headed to the car wash, we opened it up, sat it in the back of her truck and sprayed away and the thing was seriously brand new afterwards. Seriously. People. I remember taking it all apart before and washing all the pieces and hating putting it back together and it didn't look near as good. Now when your spraying don't get the washer thingy to close as that's alot of pressure, also hold onto it, it will blow, lol. When your done take it home and set it out to dry. It will be perfect.

2. Same thing with shoes. I know, I know crrrrazzzyyyyy...But seriously, when my lil sis and I were cheerleaders in highschool, our shoes were white and would get horribly dirty after football games. We would wear them to the car wash and spray away ( again don't get to close ) then take them home and let them dry, looked like new. Much better than the washing machine or spending an hour scrubbing on them. It's kinda fun too :)


3. I know most of you already do this one but anyway. Clorox Wipes are Fabulous! I remember my aunt talking about them once, I used them but not like I do now since hearing her discuss it. I have canisters of them all over the house, my fave the orange ones for the kitchen, you can smell it forever and it smells so clean and good. They are so great for in the bathroom, to do a quick wipe down everytime your in there, then it stays clean. Same goes for the kitchen. Wipe, wipe, wipe, if your in the room get one out and do a quick wipe down. I use them on my desk, my coffee table, the walls, doors, everywhere. Wipe as you go and you won't be wiped at the end of the day but your house will sparkle. Bahhahaha, ok so that was lame. Anywho....


4. If your a modge podger and like me, you use LOTS of those foam brushes with the wooden handles. I use them for everything and especially when I am working with modge podge. I feel so wasteful though as I use them once sometimes and throw them out. If you have a quick little project and just need a little modge podge and have to use one, either rinse it and use it again later or clip off the end of the brush and reuse it. The wooden handles usually pop right off and those are great little stir sticks for small cans of paint or smoothing paper out when modge podging. I am sure they could also be used in a craft project somewhere down the road.


5. Coupons. I love me some coupons but I hate to organize them. I don't have a fancy organizer so I started using envelopes. I personally keep mine in a bin at home now, somewhat organized but I have envelopes that go in my purse with the different store names written on the outside. Then when I make out my lists or know that coupon will be used there, I stick it in the envelope for that store and it's so much easier when I go to do my shopping.


6.  Now like the bins I showed you above, if your looking for organizational items. Craigslist is another great place to look. I got 9 or 10 of the above jars that are originally from Ikea ( we don't have one nearby ) from a lady on craigslist for $5 for all of them. These are perfect to hold little things in my craft room. I also got the 10 matching baskets below for $20 I believe awhile back from craigslist and they will all fit perfectly on my bookshelf in my craft room to house all kinds of things and I love that they all match!


7. If you have lots of ribbon, or even ribbon pieces and scraps you would like to store easier, they are so cute wrapped on the old timey clothespins. For a tutorial go here. I found Nichole's blog the other day and you must go over and check out her pretty ribbon storage! I don't have a ton of ribbon but think it's so cool and will be doing this with what I do have.  p.s. Isn't that scrapbook paper awesome? I got it on clearance and can't wait to make something with it. I love paper with writing and text.


DIY Day @ ASPTL


I am also linking this post to DIY Day over at Kimba's a soft place to land. Head over there here or by clicking the above button to check out everyone's projects for the week. Don't forget to head over to Sarah's for the Clean and Fresh Party here.

Head over here and see the super cute clay birds my Moms made on old light fixtures!! They are the cutest!

Have a Wonderful Week Everyone!!!!


Tuesday, January 12, 2010

2 Yummmy Meals out of one Roast in the slow cooker!


Photo from here.

I found this recipe here a couple of years ago when googling and looking for a new roast recipe. I absolutely LOVE cooking in my slow cooker! It's awesome as it's basically dump and go, and then about 8 hours later you have a Fabulous meal that you did virtually nothing to prepare.

Now I admit I was skeptical at first myself, sounded a bit to salty but TRUST me it's Awesome! This is the only way I make my roasts now....

I do everything exactly as the recipe from RecipeZaar says except I always brown my roasts beforehand in a tiny bit of olive oil.

Ingredients

  • 1 beef roast, any kind
  • 1 (1 1/4 ounce) package brown gravy mix, dry
  • 1 (1 1/4 ounce) package dried Italian salad dressing mix
  • 1 (1 1/4 ounce) package ranch dressing mix, dry
  • 1/2 cup water

Directions


  1. Brown your roast in a tiny bit of olive oil. Then place in your crockpot.

  2. Mix the dried mixes together in a bowl and sprinkle over the roast.
  3. Pour the water around the roast.
  4. Cook on low for 7-9 hours.
A little more than halfway I add in cut up potatoes and carrots. LOTS of carrots for us as we love them!! This recipe makes a yummy gravy for the potatoes! I always make angel hair pasta right before the roast is done and the roast, potato, and carrot mixture with the gravy is sooooo goood!!!! Serve it with some yummmy bread or rolls and your ready to eat!

Not only is this recipe easy peasy but I love that it requires only a few ingredients and is very inexpensive to make! We always have leftovers. Wanna know what I do with the leftovers? This is almost better than the first time around. I said almost.


1. Take your leftover roast, doesn't matter if it's pork or beef, whatever will work and tear it all apart.


2. Now heat up a skillet with a couple of tablespoons of olive oil ( butter works to ) in it and add your meat.


3. Just cook it long enough to very slightly crisp it and warm it up.


4. Take some sandwich rolls, sliced bread, or hamburger buns with mayo ( that's how we roll ) or whatever your preference and fill with your meat and Enjoy! 

It is soooooooooooo good! It's good with a slice of provolone cheese too!

One Super easy and Yummmo Roast = 2 nights of dinner or dinner and lunch the next day!!


Monday, January 11, 2010

Making a Photo Wreath....

I have been wanting to post this for awhile now. I seen something similar done with Christmas cards on Martha's site here, I did her tutorial exactly but instead of Christmas cards was going to use black and white family photos. I got all my clothespins glued on and it was ready for pictures then I seen one like mine only much better above in my December issue of Country Living and liked it better. So off I went...


I used an old quilting hoop, randomly glued all of my pictures on to my liking trying to mix the sizes up. I order prints of all my photos through either shutterfly, cvs, or walgreens. Depends on who has the best deal when I go to order. Shutterfly is my favorite as if you sign up to receive their emails they are constantly emailing you deals. You definitely don't want to go gluing your favorite pictures unless you have doubles :)


Lay them out however you like best. I actually had my craft table to work on which is easiest to do standing at a table so you can move around and see it from all angles. Yes, my craft table is clean.

 
I completely recommend black and white photos with maybe a mix of sephia toned photos, however I could not find all my photos and was lucky ( hence the whole organization saga ) to find these and well I'm impatient so I worked with what I had. So I edited in black and white to give you an idea.


There are lots of fun things you could do with this. This looks odd but if you have the right frame it would look pretty sweet hanging over an empty frame. Or you could make a cute little sign with your family name on it to hang in the middle or something vintage and fun. Ohhhh and by the way I will totally be hanging this from some chunky black ribbon, however again with the organization and not being able to find things. I have a door table that my mom made me in my entry way and as soon as I have the ribbon and my entryway organized ( check the organization calendar to the right ) I will be hanging mine there.

Try it with vintage valentines, Christmas cards, or maybe even a mix of vintage photos, papers, postcards, or any ephemera. Super cool.


DIY Day @ ASPTL


I'm linking up with Kimba over at a soft place to land for DIY day!!! Head over and check out all the cool projects everyone has come up with for this week!


Saturday, January 9, 2010

A little bit of everything....


First check out the Awesome amount of snow we received on Thursday!! I think we ended up with almost 7 inches. Some may not think it's awesome but I love snow, it brings a smile to my face.


Secondly, Are these not the coolest push pins ever? I found these Christmas Eve in the clearance at Hobby Lobby while doing a little last minute shopping.


I bought a bunch! I LOVE them! They are a nice size and heavy


 And these giganto scissors husband bought me. They are about 18 inches. We seen them Christmas Eve at Hobby Lobby and they were on sale for like $6?....I have been wanting some to hang on my wall in my craft room. These will go nicely with some super cute artwork I'm working on for in there :)


I haven't gotten to do ANY crafting the past few days as I am hard at work getting my craft room organized as I HAVE to have it completed by the end of tomorrow so I can go down the list. Next is the kitchen and I will be posting about that on Wednesday. I have been working on some new fun blocks, like the one ( don't worry it's not done ) above.


I also did finish these up last week. They turned out ok. I just printed my pictures out on regular ole printer paper. I added the letters to my pictures using my fave www.picnik.com Anyways, I was just playing around and trying them out. I do like them and they will look so much better using the proper paper and color. They are supposed to be black and white but they were printed on a black and white printer only so hence the dullness.


Also some more Love blocks.


Oh and check out my new etsy banner, isn't it cool? Love the little owl! I got mine here and let me tell you this girl is Rockin Awesome!! SUPER FAST and she does a wonderful Job workin with you! You can get a custom etsy banner or blog header for about $12. She's working on one for my blog now :)

I have lots of cool projects coming your way this week and FINALLY the washer video tutorial. I am working on a photo wreath, a couple of knockoffs from Ballard Designs and Pottery Barn, a giganto bulletin board for my room, and finally finishing up the toile dressform that has been sitting and waiting for me....

I also now have a few things to make and mail before Tuesday as today I found out that a girl that I went to highschool with is battling cervical cancer and they are having a benefit next weekend the 16th and I was asked to send some things to be auctioned and of course I said yes. She is married and has 4 little ones, so please keep her family in your prayers. If anyone is interested in donating an item to be auctioned contact me and I'll tell you where to mail it.
.


Have a Lovely Sunday!


Wednesday, January 6, 2010

Inspiration Time!!!!!

When I need inspiration for ideas of course I turn to either Ballard Designs, Pottery Barn, and my latest Martha Stewart. Now I have watched Martha and visited her site before but never like the past few weeks. So many awesome ideas! I can't wait to share everything that I am working on but for now here are some pretty pics and most pertain to organization since that's what I'm working on right now. Enjoy!


This is one of my favorites. What a great way to store leftover paints!


How clever is this? Put some metal up in the back of your medicine cabinet and hang some of your things with magnets!


Got a garden or a shed? What a great way for storing your twines and other strings!


What a cute way to use old cans and they are perfect for housing the mail.


I love this one and I think I am going to do this in our bathroom. This would be great for the little guy to be able to reach his towel too.


I so love shutters and I love this idea. I can't find any anywhere! Have to have some, this is to cute!


And last but not least. This is by far my favorite! A Plate rack hanging on the wall to house your kiddos collection of books!! We are going to be working on the little guys room soon and this is definitely going in there!

I don't know about you but all of these pictures help inspire me to get organized!

Now one last thing, Check out these....


My mom made this today....


and these....Aren't these the cutest???? Ohhhh I love them so so much!


And Hello Burlappp....


And ahhhh this I love! I am working on one similar, copying ole mom :) Isn't she amazing though? I am seriously dusting off the sewing maching AFTER I organize of course. eh.

Have a Great Thursday!!!!!!


All photos from Martha Stewart.